How to Apply for the Google Ad Grant in 5 Easy Steps
Applying for a Google Ad Grant isn’t as hard as you may think! Simply follow these five easy steps below to open your Google for Nonprofits account and complete your Grant application.
What you’ll need to get started:
-
-
- Your organization’s EIN, physical address, contact information, and website address
- An email address that is checked every day
- (Optional) A validated TechSoup account. This will greatly help to reduce the wait time as your application is processed (more on this in Step 2).
-
⏲️ Estimated time to complete: Submit application and set up the account (20 minutes); Wait time for the application approval process (2-14 days)
Step 1: Make Sure You’re Qualified
In order to qualify for Google for Nonprofits and a Google Ad Grant, your organization must:
-
-
- Hold valid charity status. This typically comes in the form of a 501(c)(3) tax-exempt nonprofit organization. You can view the Google for Nonprofits site for definitions of charity status in your country.
- Acknowledge and agree to Google’s required certifications regarding nondiscrimination and donation receipt and use.
- Have a “high-quality website that meets the Ad Grants website policy.” This involves things like owning your website and having an SSL certificate installed (aka HTTPS).
- Get approved through the Ad Grants pre-qualification process. Directions for this are below.
-
Note, you may not apply to Google Ad Grants if you are:
-
-
- A governmental entity or organization
- A hospital or health care organization (however, charitable arms or foundations associated with healthcare organizations are eligible).
- A school, academic institution, or university (however, philanthropic arms of educational organizations are eligible).
-
Step 2: Visit the Google For Nonprofits Website
Once you visit the Google for Nonprofits site, click the “Get Started” button.
Step 3: Complete the Google for Nonprofits Application

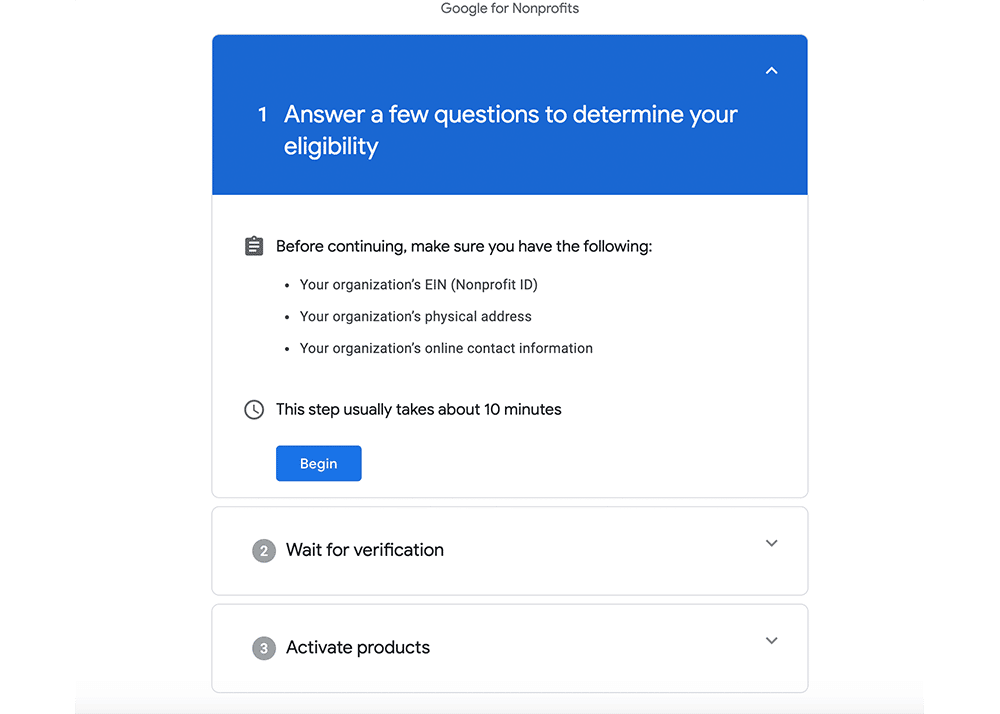
This is what your Google for Nonprofits application will look like. Select “Begin” and you can start filling your’s out.
When filling out the application, here are a few helpful tips:
-
-
- Have your official organization’s name, physical address, and EIN handy.
- Make sure your mission statement can be easily found on your website.
- Use your organization email address for the application, as opposed to a personal or a temporary email address. You can add other emails once you are accepted, but it is difficult to change the original email attached to the account.
- Although it’s not required, setting up a TechSoup account and obtaining a validation token will greatly speed up the processing of your application. Set up a TechSoup account. Then, request a token, here. The token will look something like this: “111a222b@Nonprofit123”
-
Step 4: Hold Tight for 2 – 14 Days (and, pat yourself on the back)
You should receive an email within 2-14 days letting you know if you have been verified.
If your application is denied, you can appeal the response within 24 hours. But don’t worry, as long as you fit the criteria above, your applications should be accepted without issue!
Step 5: Click the Link in Your Verification Email
To finalize the process, click on the link in your inbox, and you’re done…for now!
____________________________________________________________________
You’ll want to check out our next tutorial, How to Set Up My Google Ad Grant for Success, to build your account and start taking advantage of $10,000 in your Ad Grant!
You can also download our free resource, The Ultimate How-to Guide to Google Ad Grants.
